Friday, April 30, 2010

InStyle, April Blog Hop: Mother's Day

Hi All,

Welcome to the April blog hop with InStyle Stamps! This month's theme is Mother's Day, as that special day is coming up in a couple weeks!  If you are coming from Angela's blog, you are on track.  If not, please head over to the ISS blog to see the complete lineup!

For my project, I decided to make a fun box to house a gift for that special someone.  I m using the Happy Mother's Day flower from InStyle Stamps.

My box base is Tempting Turquoise CS, with some added strips of Bali Breeze DSP on the sides.  The inserts are done with Marigold Morning.  The lid is made from Marigold Morning CS, Bali Breeze DSP, and a transparency sheet.  I tied some Bermuda Bay Polka Dot ribbon around the whole box to keep everything in place.

I added some Martha Stewart Gerber Daisies to the top right corner - they are self-adhesive and so pretty!  They've got a lot of sparkle in the middle too.

I printed my flower onto PTI White CS three times, coloured them with Copics, cut them all out to layer them, and cut out the panel with Label Nesties.  I sponged inside the stencil with Apricot Appeal ink also.  I adhered that to the bottom left corner of the box.

I hope everyone is enjoying the Mother's Day images from ISS!  Thanks for stopping by!
Your next stop is Janelle!

Thursday, April 29, 2010

CPS 164: Koala

Hi All,

I am playing along with the Card Positioning Systems sketch for this week: #164.  It was a nice sketch to work with - lots of space to create. Here it is:


Hmmmm, what could I do with it?  I immediately thought of the Critters at Some Odd Girl, and I chose the adorable Koala

My card base is Whisper White CS, and I made it loooooooong, just like the sketch.  The next layer is Blue Bayou, which was partially embossed with the Forest Branches Cuttlebug folder.  For the next panel, I used a piece of Porcelain Prints DSP, matted with a Basic Black piece.  I tied a piece of Striped Wild Wasabi ribbon in a knot to the left end of the card (I cut a slit in the fold to tie the ribbon through).

For the main panel, it is another piece of Porcelain Prints DSP, matted with Basic Black, and then Wild Wasabi CS.  I printed Koala onto PTI White CS, coloured it with Copics, and cut him out.
I cut out a few pieces of Wild Wasabi and cut them to different lengths, and then cut all of them with my Martha Stewart grass edge punch.  I mounted those on with Dimensionals in different layers and at different levels.

Hope you enjoyed, and thanks for stopping by!

Sunday, April 25, 2010

InStyle Gift Box

Hi All,

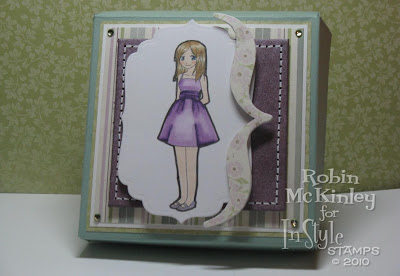
I decided to make a cute gift box with some chipboard, and an InStyle Stamps digi!  I am using the adorable Ingrid on this one. 

I wanted to make a quick and easy little box for some treats or a small gift.  I went with the Mini Pizza Box - 1 sheet of cardstock, and some embellishments!

My box is made from Sage Shadow CS.  For the next panel, I used a square piece of chipboard, which I covered with purple Dew Drop ink and added faux stitching to.  I matted that square with the striped paper from SU's Enchante pack, then a Whisper White square, and a green square of the DSP.  I added some green rhinestones to each corner.

I printed Ingrid onto PTI White CS and coloured her with Copics.  I also outlined her with a black Atyou Spica glitter pen. I cut her out with Label 4 Nesties, and mounted that panel with Dimensionals.

For the bracket, it is a Dimensional Element (chipboard) from Close To My Heart.  I covered it with some Enchante DSP, and mounted that beside Ingrid with Dimensionals.

Hope you enjoyed, and thanks for stopping by!

Thursday, April 22, 2010

Some Odd Girl Stash Challenge: No DSP

Hi All,

This week's challenge over on the Some Odd Girl blog is to make a project with no designer papers!  Now, I know there are some fanatics out there that cannot make anything without those special papers!  For me, I usually use them, but I can do without if I have to.
I used the adorable Curtsy Kaylee for this card. I {heart} her!!! She is perfect for colouring!

Here it is:

My card base is Marigold Morning CS, then a layer of Whisper White, then Basic Black.
For the main panel, I took a piece of Whisper White CS, and stamped the sentiment in Basic Black ink.  It is from a Close To My Heart alphabet that is made for stitching.  Can you guess what I did all last night?  Yup, stitched those letters in!  I used some black thread and a needle to hand-stitch everything.  I matted that with a Basic Black layer, then a Baja Breeze layer.

I printed Kaylee onto PTI White CS, coloured her in with Copics, cut her out, and mounted her on with Dimensionals.  I think this is my favourite Kaylee image!  But, it's really hard to choose...they are all so cute!

By the way, don't forget to download this month' free image: Mae!  She is Kaylee's best friend, and you will be seeing a lot of her coming up on April 20th!!!

Hope you enjoyed, and thanks for stopping by!

Wednesday, April 21, 2010

New Release Day!

Woo hoo!  Some Odd Girl Digital Stamps has officially released a whole new wave of digi stamps! Kristy has added some cute images to the already-existing categories, and she has introduced Mae, a whole new category!

Head on over to the STORE to pick up your fave's!!!

Have fun!

Sunday, April 18, 2010

Bathtub Fun

Hi All,

I decided to make a project using Sheree from InStyle Stamps.  She is having a blast relaxing in her bathtub, and I thought she was the perfect image to make some gift packaging with!

Here it is:

I actually found these pre-scored envelopes from SU in my stash.  I chose the Chocolate Chip one, and put it together.  I added some Rich Razzleberry Polka Dot ribbon to the top section in a cute bow.  Do you ever think, "why can't the ribbon have the same pattern on both sides???".  I always think it looks funny when there are parts of the bow/knot that are plain, and parts that have a design.  And, I'm not talented enough to tie it so that it is all uniform.  Oh well!

On top of the pocket, I added a Whisper White layer, then a Rich Razzleberry layer, then a layer of Lovely Flowers DSP.

I printed Sheree onto PTI White CS, and coloured her in with Copics.  I added some Crystal Effects and Stardust Stickles to all her bubbles to make them shiny and sparkly.  I cut the panel out with Curved Rectangle Nesties, and added some Rich Razzleberry dots around the outside with a marker.  That was mounted on with Dimensionals.

I thought this would be a great little packet to give someone and fill it with bath salts and those individual facial masks you get from the drug store.  Or, you could put some yummy InStyle Stamps in it...


Hope you enjoyed, and thanks for stopping by!

Winner Announced

Hi All,

I am just dropping by to announce the winner of the giveaway from the DT Intro days at Some Odd Girl.  I was giving away the image Gorky, if you will recall THIS post.

The winner is......Karen B!  She said: Hiya Robin, thanks so much for visiting my blog and leaving such a nice comment :) I loved reading your bio... I can see NOTHING wrong with wanting to hang out in the male models' changeroom.  And I can totally identify with having a special place in your heart for chocolate! Chocolate is, after all, one of the five basic food groups, LOL! Loving your card and now I'm off to explore some more of your blog. Congrats on your Some Odd Girl appointment :)

Thanks for the comment Karen!  Please email me at mckinley {underscore} robin {at} yahoo {dot} com and I will send Gorky over to you!

The Some Odd Girl Blog will be choosing a winner this week from the last style challenge, and will be putting up a new stash challenge! Hope to see you all there!

Thursday, April 15, 2010

Savour the Moment

Hi All,

The Kraftin' Kimmie Stamps blog has announced that they are sponsoring the Card Positioning Systems sketch for this week #162. Head over here to post your link!

I absolutely LOVED this sketch:


There are so many amazing possibilities!

Here is my take:

My card base is Basic Gray, and I added a layer of Whisper White, Basic Black, and Nouveau Chic DSP with white stitching around it.  For the 3 panels, they are also Whisper White, Basic Black, and DSP, but I added a Pewter Jumbo eyelet to the end of each one with my Crop-A-Dile.

For the main panel, I stamped Gabrielle onto Neenah Solar White CS, and coloured her in with Copics.  I also stamped my sentiment from Kimmie's Tea Sentiments at the bottom in black ink. I matted that layer with a Basic Black and Basic Gray layer, and mounted it with Dimensionals.

Pretty simple, but effective! And a great way to showcase your DSP!

Hope you enjoyed, and thanks for stopping by!

Wednesday, April 14, 2010

OHDBCGA: Mother's Day

Hi All,

It's time for this month's Over the Hump Day Blog Candy Giveaway! Head on over to the InStyle Stamps blog to see all the DT creations!  This month's theme is Mother's Day, so we are all making Motherly-type creations.

For my creation, I used Jasmine - she's so cute!

My card base is Almost Amethyst.  Next is a layer of Basic Gray, then Basic Black, and Whisper White.  I scored the Whisper White piece with my Scor-Pal, and added Opal White Liquid Pearls in between the diamonds.

Jasmine was printed onto PTI White CS, coloured with Copics, and cut out with Long Rectangle Nesties.  I added a Basic Black rectangle, and an Almost Amethyst scallop rectangle.
The sentiment is from Verve, and was stamped in Elegant Eggplant onto PTI White CS.  I also stamped a flower in Almost Amethyst ink on that panel, and cut it out with my Key Tag Punch.

Hope you enjoyed, and thanks for stopping by!  Make a Mother's Day project and submit it on the ISS blog for a chance to win some fab blog candy!

Tuesday, April 13, 2010

CardPatterns Sketch #59: Bulb

Hi All,

I am participating in this week's CardPatterns sketch Challenge #59, and I decided to pull out my adorable digi image Bulb from Some Odd Girl Digital Stamps!  He is a new creature that will be released later on this month!

Here is the sketch:


Here is my take:

It's a pretty simple sketch...they did say on the CardPatterns blog that last week's was really difficult, and they were giving us a break this week!  My card base is Basic Gray. For the panel to the right, I used some Timeworn DSP (retired SU), and matted that with a Basic Black layer, punched with an EK Success edge punch.  At the bottom of that, I cut out a piece of Whisper White, and stamped it with a birthday setiment, and spelled out the word "human" with an alphabet set I have (Basic Black ink).  I also added some distress ink to that panel.

For the main panel, I cut out a piece of the DSP with Oval Nesties, and matted that with a Black oval, and added some white stitching around that.  Bulb was printed onto PTI White CS, coloured with Copics, cut out, and mounted on with Dimensionals.

I added a button to the corner of that oval.  It is actually a clear button, embossed with Silver EP a couple times, and I tied some silver cord through it, and attached it with a Mini Glue Dot.

I thought it would be a good card for a guy, or for a kid, so we'll see who the lucky recipient is!  Hope you enjoyed, and thanks for stopping by!

Sunday, April 11, 2010

Bellarific Friday: Martini Birthday

Hi All,

It was my friend's birthday on the 9th, and I wanted to make her a really fun card!  A bunch of us girls went out to a night club for some dancing, so I immediately thought of martinis as the theme for her card! Since the weather is getting to be really nice, I decided to go with Springtini from Stamping Bella.  I had to use the matching sentiment as well!

I also made this card for this week's Bellarific Friday Challenge: Anything goes! They are building up to a release at Stamping Bella, so they are celebrating with no restrictions!

It's a pretty simple card - I really wanted the image to stand out.  My card base is Yoyo Yellow (I never use that colour!).  The next layer is Whisper White, Basic Black, and a layer of Bermuda Bay, which was embossed with my Floral Screen Cuttlebug folder.  I wrapped 3 pieces of Bermuda Bay Polka Dot Ribbon around that layer.

For the main panel, I stamped the martini onto PTI White CS with Memento Tuxedo Black ink, and coloured it in with Copics.  I also used some Prisma colour pencils with OMS in some small parts.  I stamped the sentiment just below that in the same ink, and matted the whole layer with a Basic Black piece.

You've gotta get to Stamping Bella and see all their images...there's something for everyone there.  And, can you believe it?  I only live about 40 minutes away from them!!!

Hope you enjoyed, and thanks for stopping by!

Saturday, April 10, 2010

InStyle Colour Challenge

Hi All,

It's time for another colour challenge from InStyle Stamps! Happens every second Saturday of the month.  To see what the whole DT have done, head over to the ISS Blog!
This is a special challenge, because we are also participating in the Fussy and Fancy Friday Sketch Challenge! Woah, multi-tasking!  This sketch was designed by Mindy Baxter.

Since Mother's Day will be coming up soon, we got some very "motherly" images to work with! This one is called Christine and Baby Jayla - aren't they cute???  This image hasn't been released yet - it will be coming towards the end of April.

Here is the colour challenge from ISS:


And here is the sketch from Fussy and Fancy:


My card base is Crushed Curry.  Then, I have a layer of Whisper White, Basic Black, and Crushed Curry again, embossed with the Dots Cuttlebug folder - but only the top 3/4, or so.  I added Old Olive eyelets to each corner of this base layer.  Next, is a tall rectangle panel made from Whisper White, Basic Black, and Old Olive CS, which was embossed with the Mesh Cuttlebug folder.  Across that, I added a strip of Basic Black CS, matted with Whisper White, which was punched with the Martha Stewart fence edge punch.  I added 2 Old Olive buttons with Linen Thread to either side with Mini Glue Dots.

For the main panel, I ended up with a rectangle, instead of an oval, but tried to back it with an oval.  The back part of the panel is a Basic Black oval, mounted with a Bermuda Bay scallop oval.  Christine and Jayla were printed onto PTI White CS, and coloured in with Copics.  I added some sponging with Old Olive, Crushed Curry, and Bermuda Bay inks, and added some doodling around the frame with a black marker.  I stamped the sentiment (SU) sideways onto the panel in Versamark, and embossed with black EP.  I topped the whole thing with a bow made from White Organdy ribbon and my Bow Easy...attached with a Mini Glue Dot.

I hope you enjoyed, and thanks for stopping by!

Thursday, April 8, 2010

Some Odd Girl: 1st Style Challenge

Hi All,

Some Odd Girl has their first Style Challenge up on the blog: it is a gorgeous sketch! Check out the blog here to participate, and link up your creation.  Of course, there is a prize involved!  You can also see everything the DT has been working on there too!

Here is a glimpse of the sketch:


Isn't it great?

Now, here is mine:

My card base is Whisper White.  Next, are Basic Black and Whisper White layers.  On top of that, is a piece of Nouveau Chic DSP (top 1/3), and Basic Gray CS (bottom 2/3).  I added a strip of Basic Black and Whisper White across that, both cut with EK Success edge punches...BIG scallops.  I added 2 photo corners on the bottom using Basic Black CS and Nouveau Chic DSP, and I added 3 Vintage brads to each photo corner.

The sentiment is an SU rub-on: white sentiment on black CS, and cut out into 3 strips.  I wanted the words to stand out, but not be too busy.

For the main panel, I used my Nesties to punch out a Basic Black circle, and a DSP circle, and added 3 black brads to the top right corner.  I printed Lounging Kaylee onto PTI White CS, coloured her in with Copics, cut her out, and sat her inside the circle with Dimensionals.

BTW, did you know that SOG has a new free digi image every month?  If you want to try the product before buying, head over HERE to download this month's freebie, Mae!

Hope you enjoyed, and thanks for stopping by!

Monday, April 5, 2010

Throwing Snowballs in April

Hi All,

I have got the cutest image from Some Odd Girl Digital Stamps to show you....introducing Kody!  He is one of the cute characters at SOG, and this one is called Snow Fight Kody. He is quite the mischief-maker, but really cute!

Also, please see my post HERE about entering to win a FREE SOG digi stamp!  And see the SOG post HERE about entering the challenge to win more free goodies!

And now, on to the card...

My card base is Brilliant Blue, followed by a Whisper White and Basic Black layer.  On top of that is a DSP layer from the retired Wintergreen pack (I {heart} that pack!), and a Whisper White layer punched with my Martha Stewart icicle edge punch.  I added some faux stitching to the icicle layer.

In the bottom right corner, I added 3 snowflakes from the Felt Flurries pack from SU, and topped it with a miscellaneous snowflake brad (from Michael's, I think).

On the left side, I cut out a circle of Washington Apple DSP, and matted that onto a Sage Shadow scallop circle cut with the Big Shot die.  I put that in the corner and cut it so that it didn't hang over the edge.  I stamped the Winter Wishes sentiment (from Verve) in Versamark, and embossed with black EP. 
I printed Kody onto PTI White CS, coloured him in with Copics and cut him out.  I added some White Stampendous fluff to the snowball to make it furry, and mounted him onto the circle piece with Dimensionals.

I hope you enjoyed, and thanks for stopping by!

Sunday, April 4, 2010

I need your vote! Battle Week 2 at TGF

Hi All,

Me and two talented ladies have entered the team challenge over at The Greeating Farm - we need your vote so that we can keep playing!  This week's card was made by my teammate Gina!  Please head over to our card in the TGF Galleria -when you leave a comment on our card, that counts as 1 vote for us!  Voting goes from Sunday to Tuesday! Then a new challenge begins on Wednesday, and it will be my turn (hopefully).

Here is what Gina made - you can also go to her BLOG and give her some love!


Isn't she fabulous???  I hope we can count on your support!

Hope you enjoyed, and thanks for stopping by!

Friday, April 2, 2010

ISS Sketch Challenge 8: Heels!

Hi All,

It's time for the InStyle Stamps monthly Sketch Challenge - happens on the second day of every month!  If you'd like to check out everything that the DT has done, please head over to the blog to see all the pics!

Once I saw these Heels, I thought I HAD to have them!  They are completely adorable, and there are so many possibilities...especially with colouring!  And I LOVE my colouring!  This is a sneak peek of sorts - these heels will not be released at the ISS store until the end of April.

Here is this month's sketch:


Hmmm......

Okay, it looks pretty fun, right?  Here is what I came up with:

My card base is Whisper White...then come the layers: Basic Black, then Whisper White, then Raspberry Tart DSP.  The strip on the left is also Basic Black, Whisper White, and DSP.

I cut the main panel out of Basic Black CS and Raspberry Tart DSP with Label 7 Nesties, and added some pink rhinestones (from Michael's) to the sides.  I stamped the sentiment from Kraftin' Kimmie onto Whisper White CS in black ink, and cut it out with the Rounded Tab Punch.  After that was folded and added to the panel, I had to add some rhinestone to that one too.

For the flower, I punched out 5 pieces of DSP with my Scallop Circle punch, and made a vintage-type flower, like Mercy's HERE.  They are really fun and easy - just scrunch them all up, unwrap them, stick a brad through the middle, and arrange them as you like!  I added some fern branches underneath, made with a Martha Stewart punch and the DSP.

The heels were printed onto PTI White CS, coloured with Copics, cut out, and mounted on with Dimensionals.  I also had to add a rhinestone to the bow on each shoe - this card is so girly, I am choking on the estrogen! LOL

Hope you enjoyed, and thanks for stopping by!

Thursday, April 1, 2010

Introducing.....ME!

Hi All,

It is my introduction day over at the Some Odd Girl blog!  We have been introducing a member of the DT each day, and every DT member is giving away a digital stamp from Some Odd Girl Digital Stamps!

Aside: there is a challenge right now that you need to check out. Kristy has challenged you to simply incorporate a rainbow into your project (could be a rainbow, or just the colours). Check out the post HERE and link up your creation!

Otherwise, let's get on with the sample and the giveaway! 

I am giving away Gorky!  I have also used him in the card on this post.  I think he is a completely adorable monster, and so fun to colour!  I always stress how much fun these images are to colour because the line art has thick black lines, and the open space is so large - it's like a great big, fun canvas!

What do you have to do to enter to win him???  Check out the post on the SOG blog, and come back here and leave me a comment telling me something about, well......myself! LOL
Comment by 11:59 pm, EST on April 14, and I will choose a name on April 15 and announce it here!

Here's my card:

The card base is Close To Cocoa, followed by a Whisper White layer, and a Basic Black layer.  The paper on the top was a miscellaneous piece of DSP I found in my stash - it looks like ripped newsprint.  I cut out a circle of the newsprint and a larger circle of Basic Black...cut that in half, and stuck one of the halves at the top, and one at the bottom.  I added oodles of dots around those with my white gel pen, as well as self-adhesive nail heads in the corners.

I tied a large bow with some black grosgrain ribbon and my Bow Easy, and attached it to the top with Mini Glue Dots. 

For the main panel, I printed Gorky off onto Neenah Solar White CS, coloured him in with Copics, and cut him out with Curved Rectangle Nesties.  I mounted him onto a black Nesty, and added white dots to that layer.  I stamped the sentiment (from SU) in Basic Black ink. 

Also, there is a freebie section on the SOG website, where you can download a different adorable image for FREE every month! Check it out!

I hope you are enjoying the festivities, and thanks for stopping by!!!  There will be a new intro tomorrow, so check back on the blog so you know where to head to enter for your next giveaway!